Automating Postmypost publishing with Make (Integromat)
What is Make?
Make (formerly Integromat) is a visual automation platform that connects services without writing code. You build scenarios from modules: each module does one thing — fetches data, transforms it, or sends it to another service via API.
How does Make work?
- A scenario is a chain of modules connected by flows.
- It can run manually, on a schedule, by a webhook, or another event.
- Data moves step by step through modules where it can be filtered, branched by conditions, and transformed by mappers.
What is Make used for?
Make helps automate routine tasks when you need to connect multiple services: collect data, process it, and send it to Postmypost for publishing. This reduces manual work, minimizes errors, and speeds up content delivery.
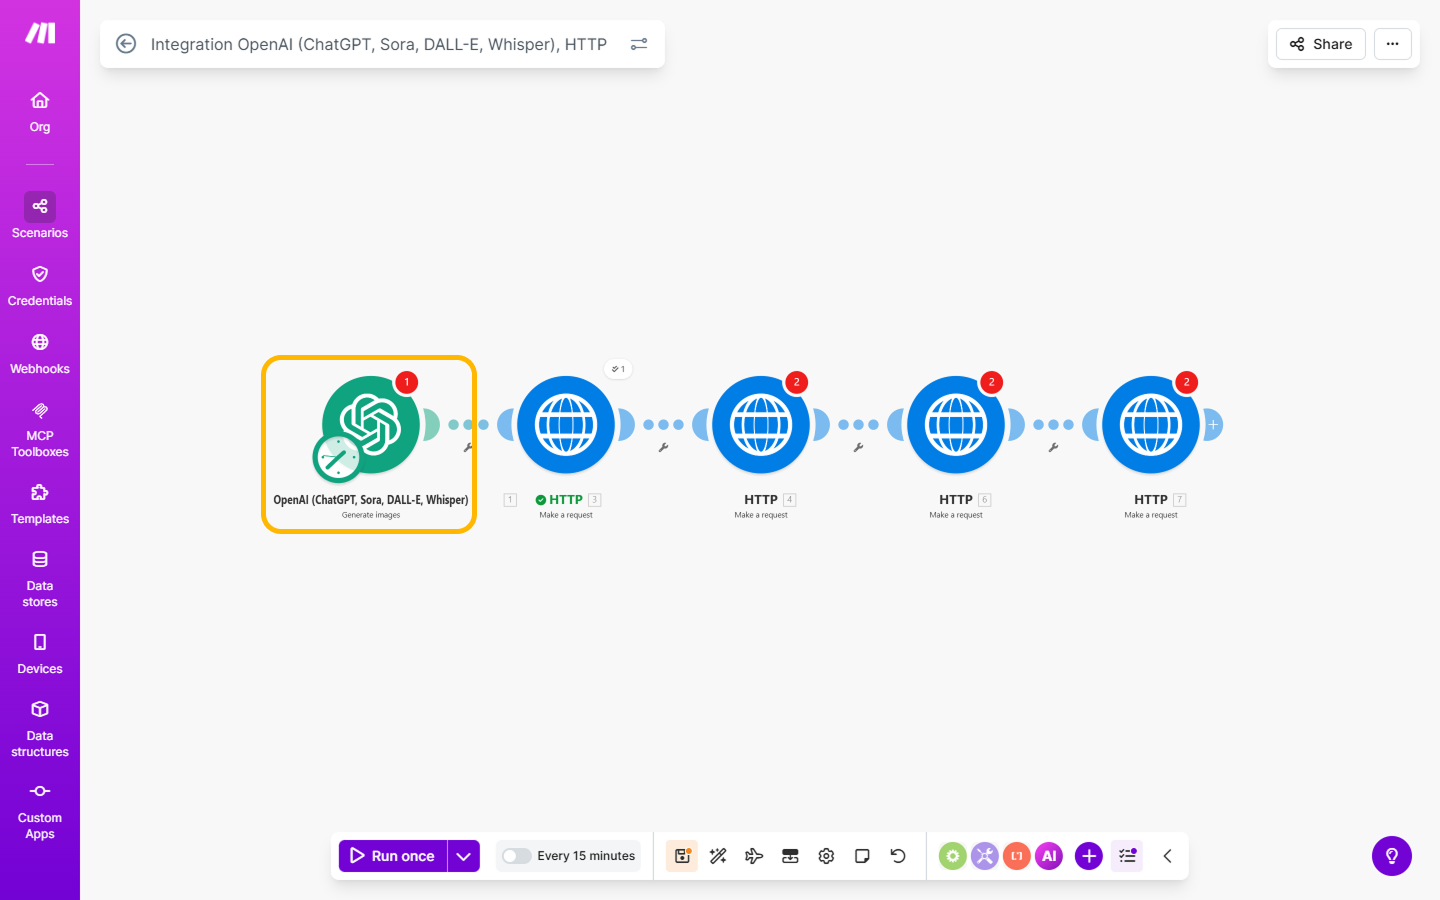
Example automation chain to create posts with AI image generation
Scenario goal:
- An AI model generates an image from a prompt.
- The generated image is automatically uploaded to Postmypost via API.
- After a successful upload, a post with this image is created and published.

Important: every request to the Postmypost API must include the HTTP Authorization header:
Important: include the HTTP Authorization header in all Postmypost API requests:
Authorization: Bearer <token>Where
<token>is your access token (see “How to get an API token in Postmypost?”).
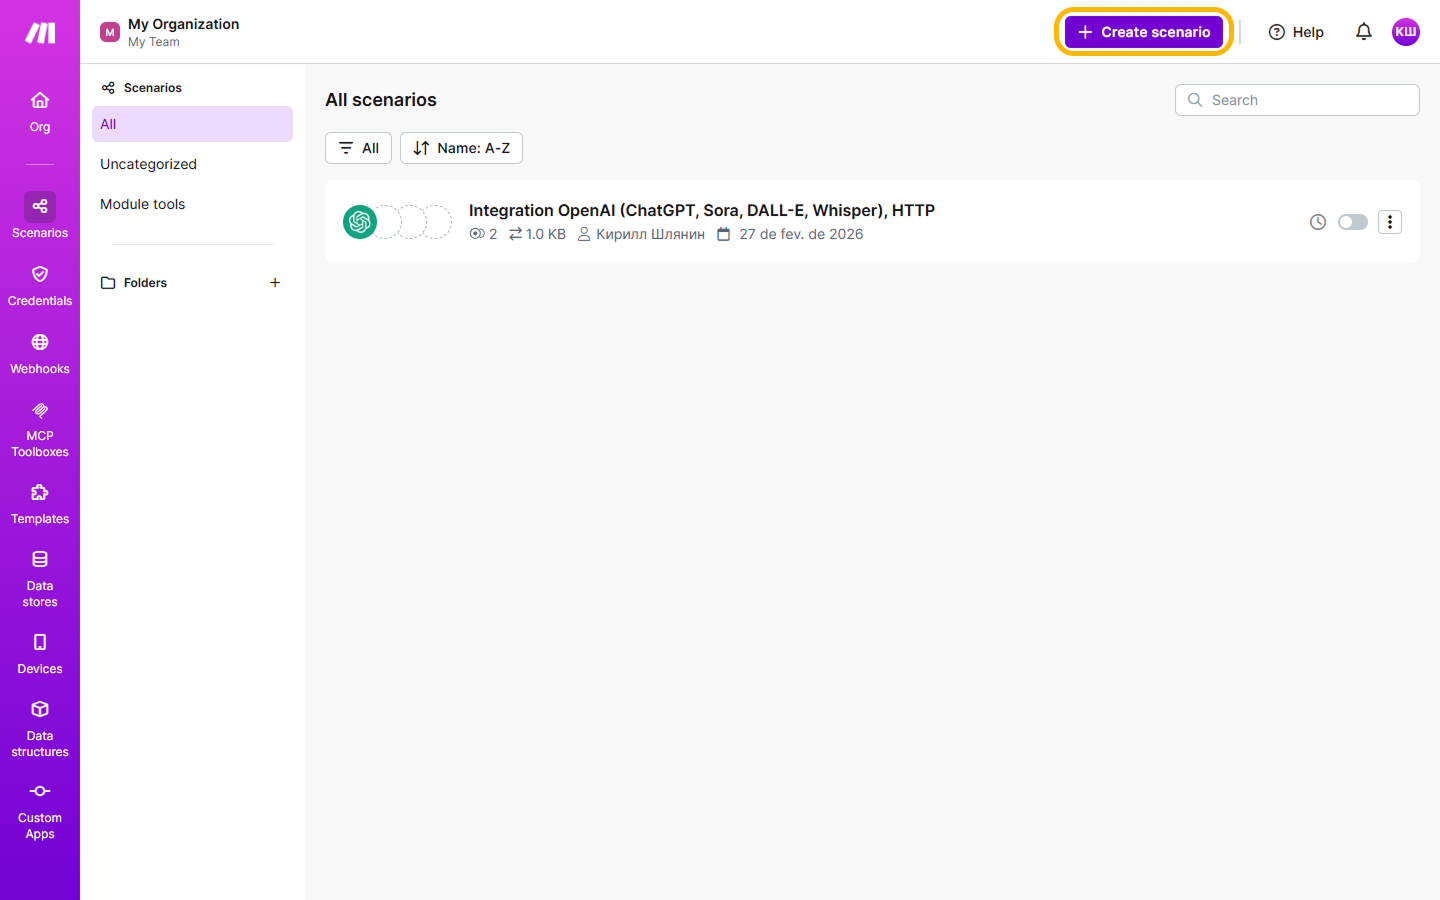
Step 1. Create a Scenario
- Sign in to Make and create a new Scenario.
- Add a trigger module (e.g., Manual, Scheduler, or Webhooks).
https://make.com/
Step 2. Generate an AI image
Implementation options:
- OpenAI module (Images/DALL·E) — if available on your Make plan.
- Or an HTTP module that calls a third‑party image generation service which returns a public image URL.
Output of this step: a publicly available HTTP(S) URL of the generated image (e.g., https://.../generated.jpg).
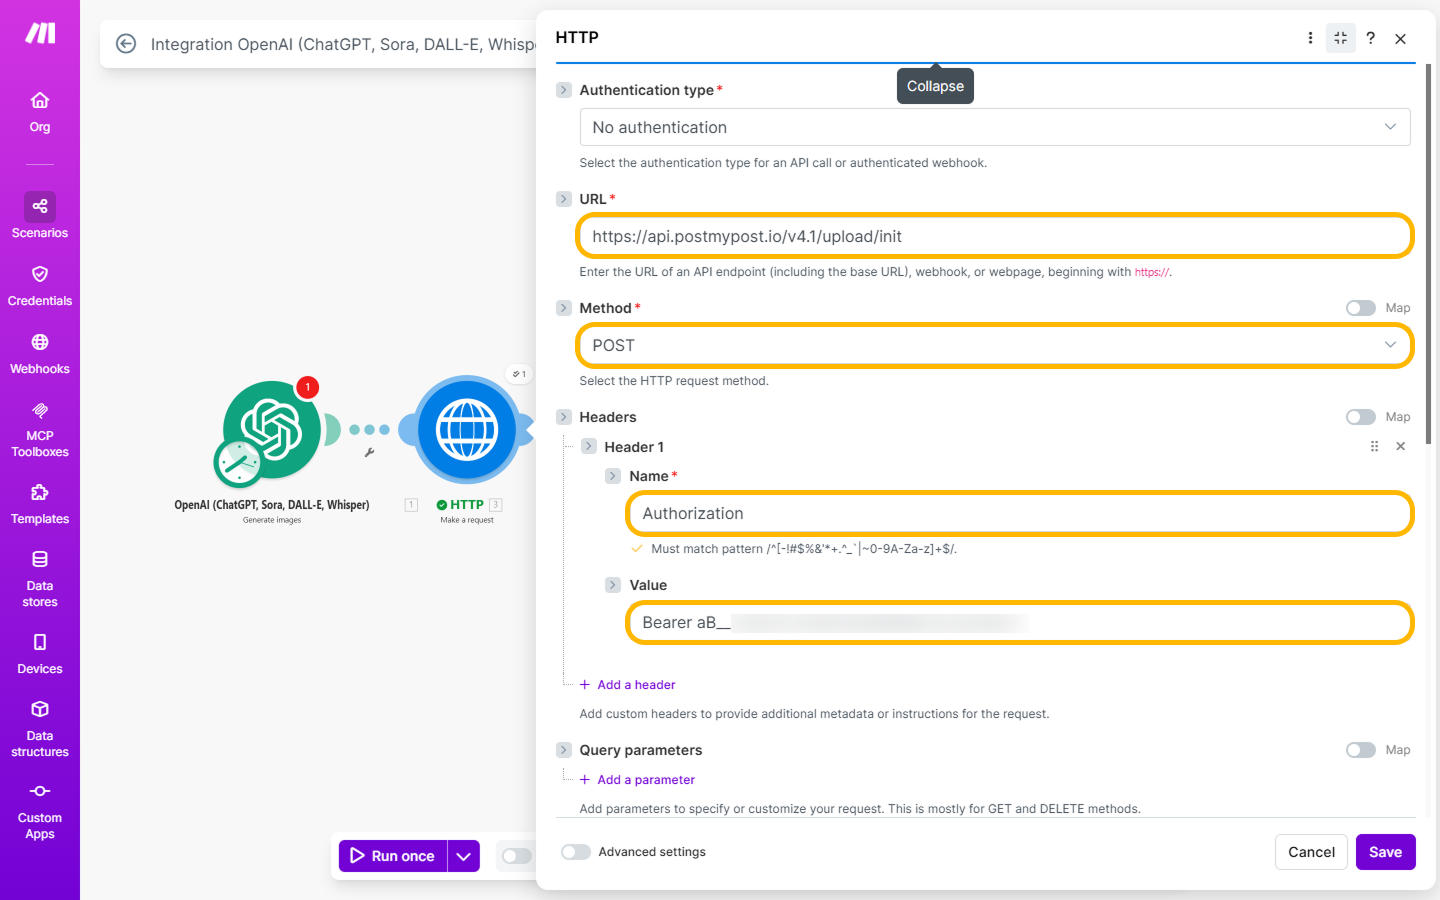
Step 3. Initialize upload (Postmypost)
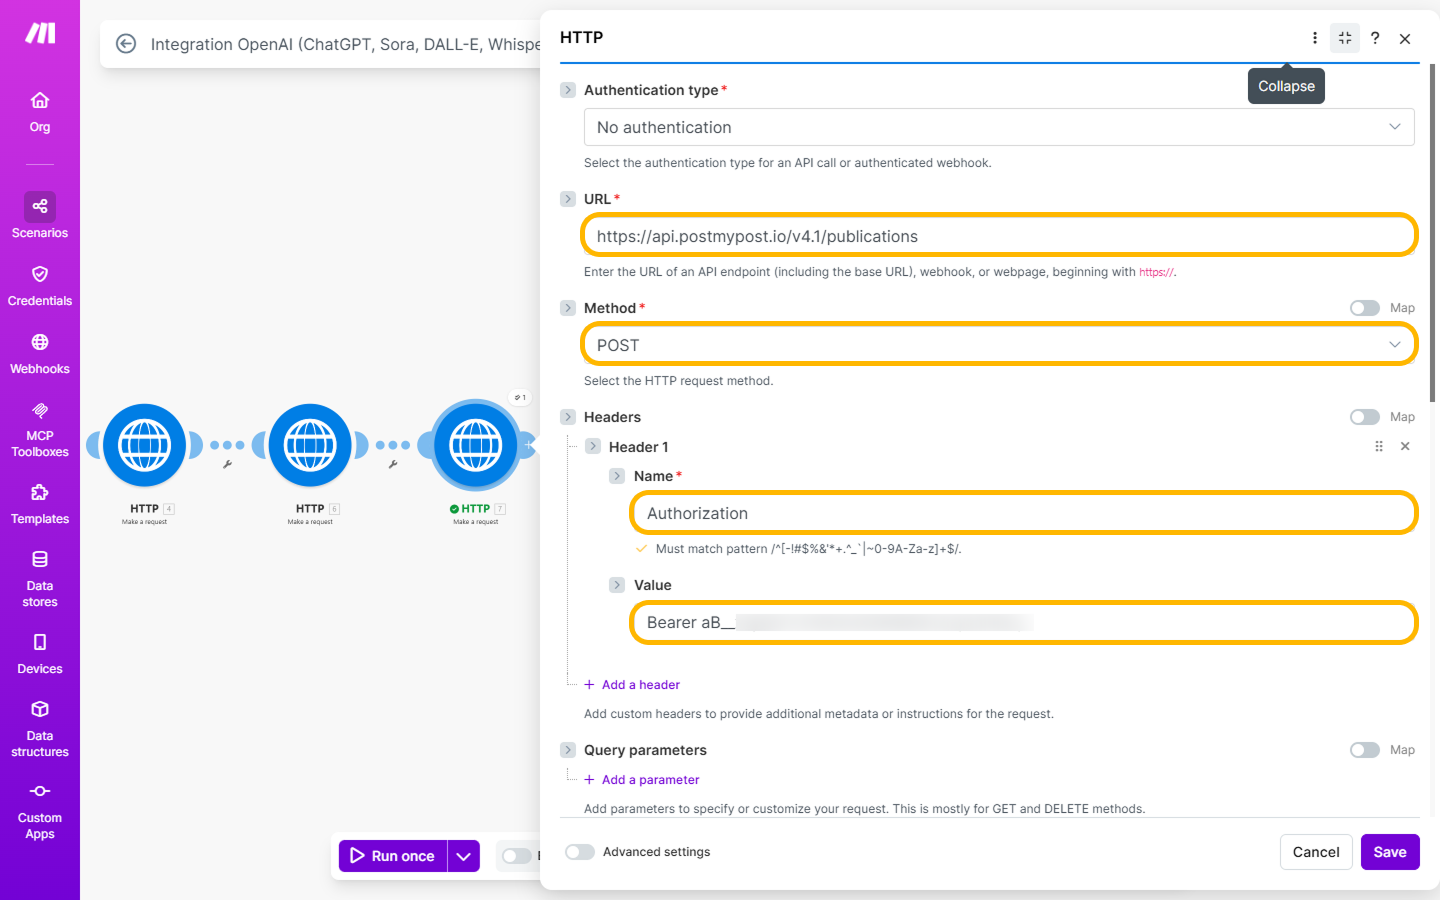
In Make, use the HTTP “Make a request” module:
- Method: POST
- URL: the Postmypost upload initialization endpoint (see your API spec)
- Headers:
Authorization: Bearer <token>andContent-Type: application/json - Body (JSON):
{
  "project_id": 245678,
  "url": "<URL from step 2>"
}
Expected response:
{
  "id": 1283466,
  "url": "https://storage.example.com/123/uploaded_img.jpg",
  "size": 259390,
  "status": 5
}
Explanation:
id— upload ID (needed later)url— temporary S3 upload URLstatus = 5— waiting for upload
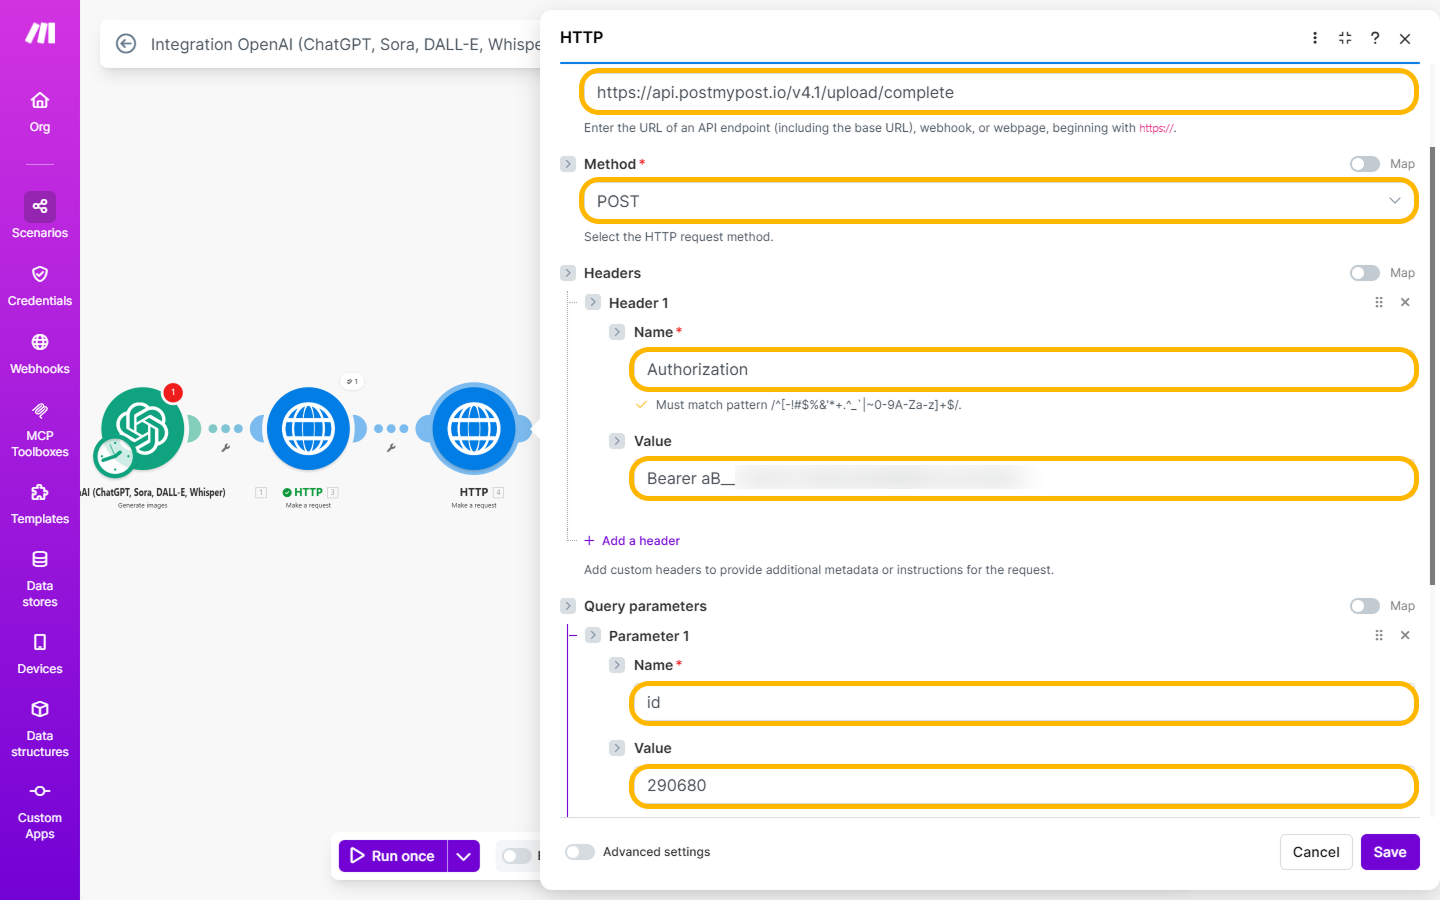
Step 4. Complete upload
Again an HTTP “Make a request” module:
- Method: POST (or according to your API spec)
- URL: the Postmypost upload completion endpoint
- Headers:
AuthorizationandContent-Type - Body (JSON):
{
  "id": 112233
}
Sample response:
{
  "id": 112233,
  "status": 1
}
status = 1 — the file has been uploaded successfully.
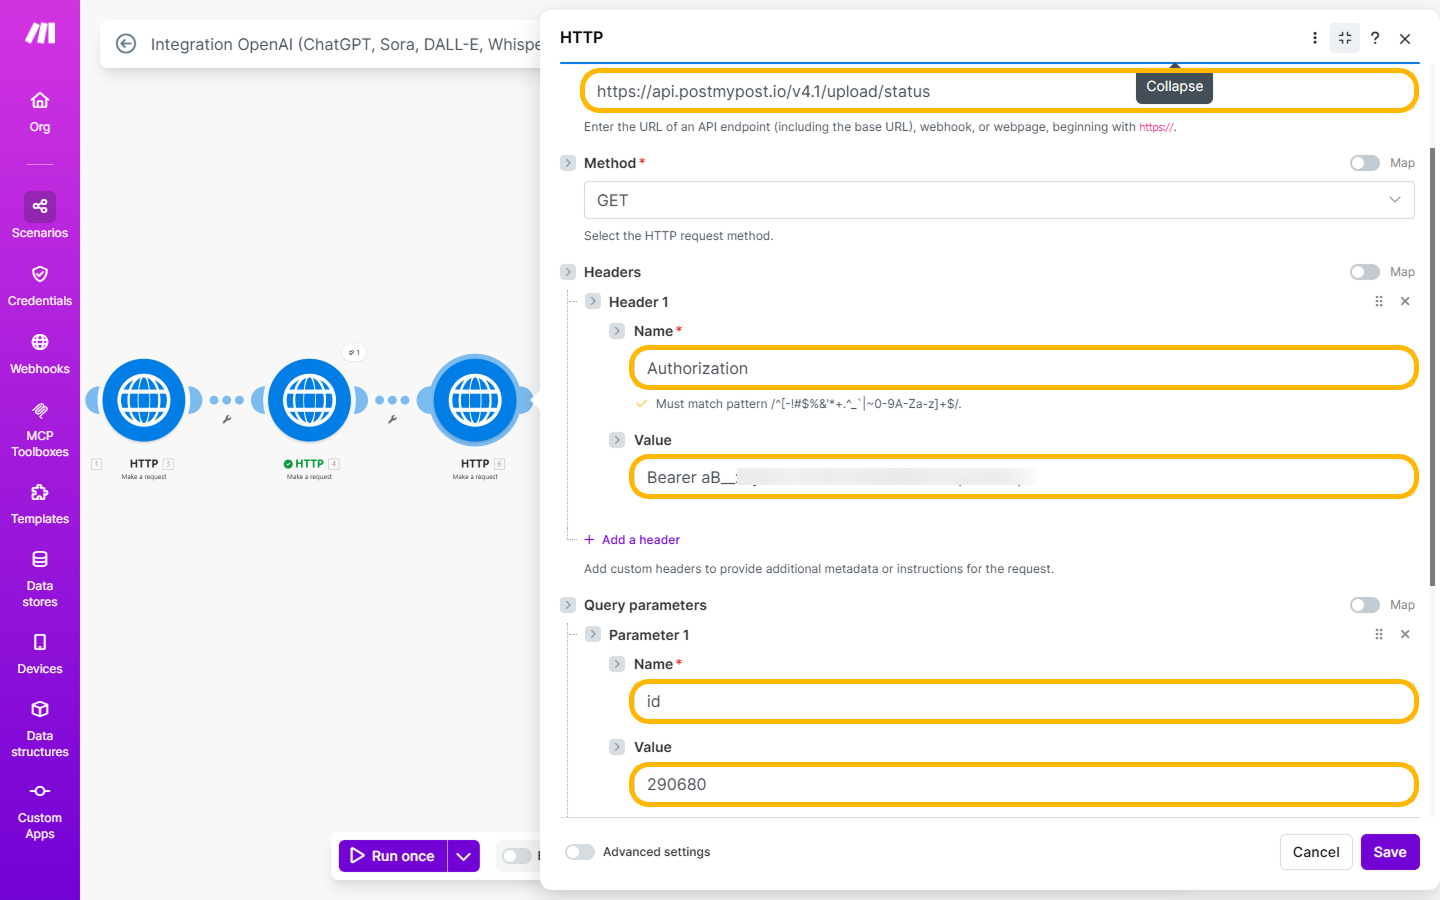
Step 5. Check upload status
HTTP “Make a request” module:
- Method: GET
- URL: the status check endpoint with the
idfrom previous steps - Headers:
Authorization
Sample response:
{
  "id": 112233,
  "file_id": 778899,
  "status": 1
}
Important:
file_id— required for creating a publication.
Statuses:
- 5 — waiting for upload
- 4 — uploading
- 3 — processing
- 2 — error
- 1 — uploaded successfully
Step 6. Create a Postmypost publication
HTTP “Make a request” module:
- Method: POST
- URL: Postmypost publication creation endpoint
- Headers:
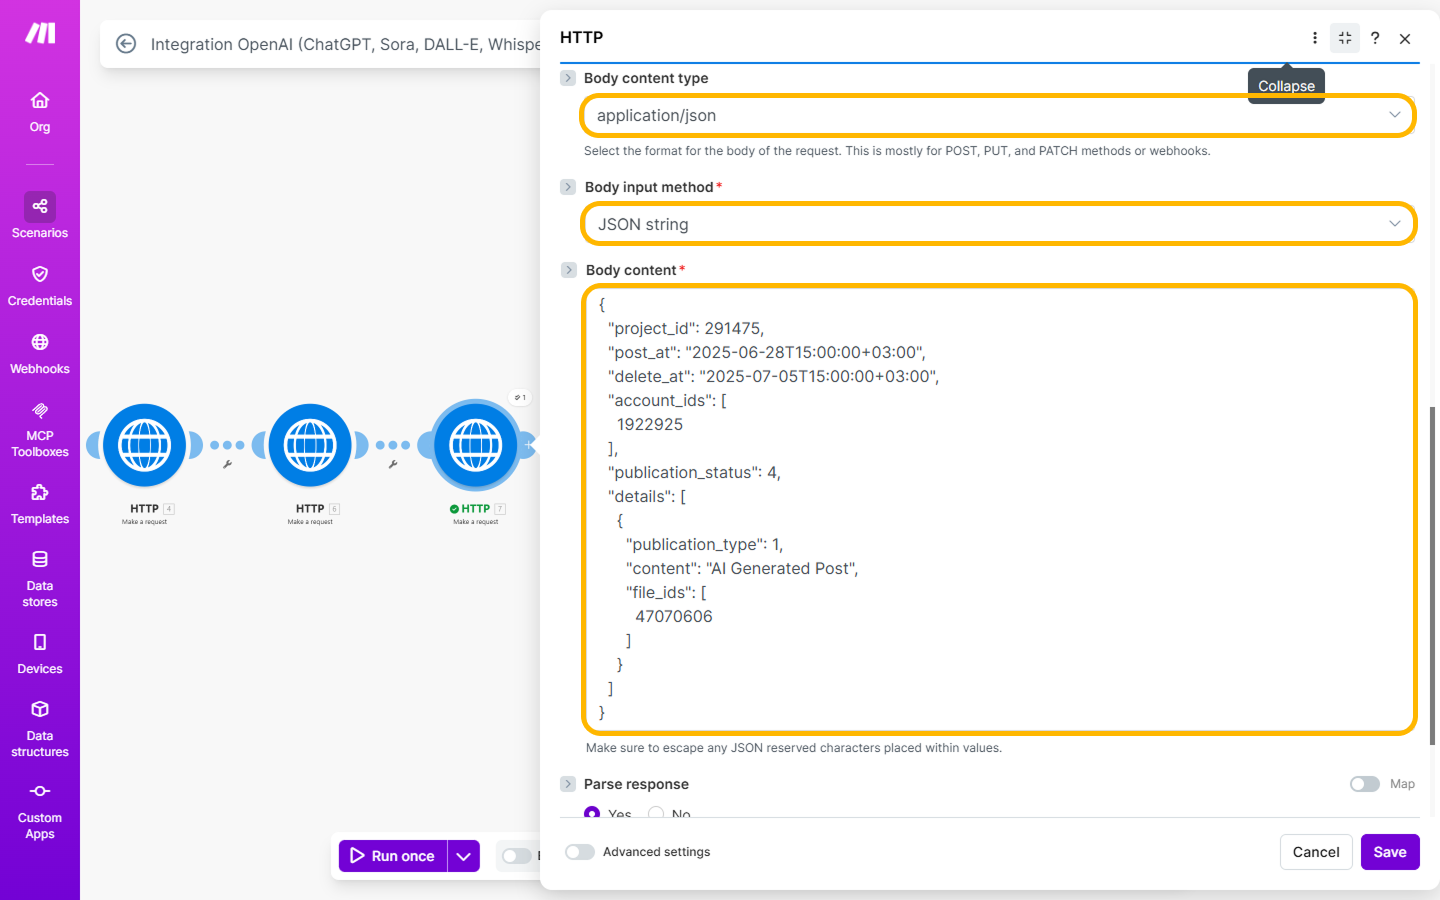
AuthorizationandContent-Type: application/json - Body (JSON):
{
  "project_id": 245678,
  "post_at": "2025-06-28T15:00:00+03:00",
  "delete_at": "2025-07-05T15:00:00+03:00",
  "rubric_id": 17289,
  "account_ids": [4, 7, 10],
  "publication_status": 4,
  "details": [
    {
      "publication_type": "post",
      "content": "Your post text",
      "file_ids": [778899]
    }
  ]
}
Where:
file_ids— an array of file IDs; pass thefile_idyou received in step 5.
As a result, you’ll get a confirmation and the publication ID.